1) Plug in a USB-A drive into the port on the right side of a Canon copier. Then press the right arrow on the display three times until you get to the last screen:

2) Press the Scan and Store button on the display:

3) Press the Memory Media button on the display:

4) Select your USB-A drive on the display:

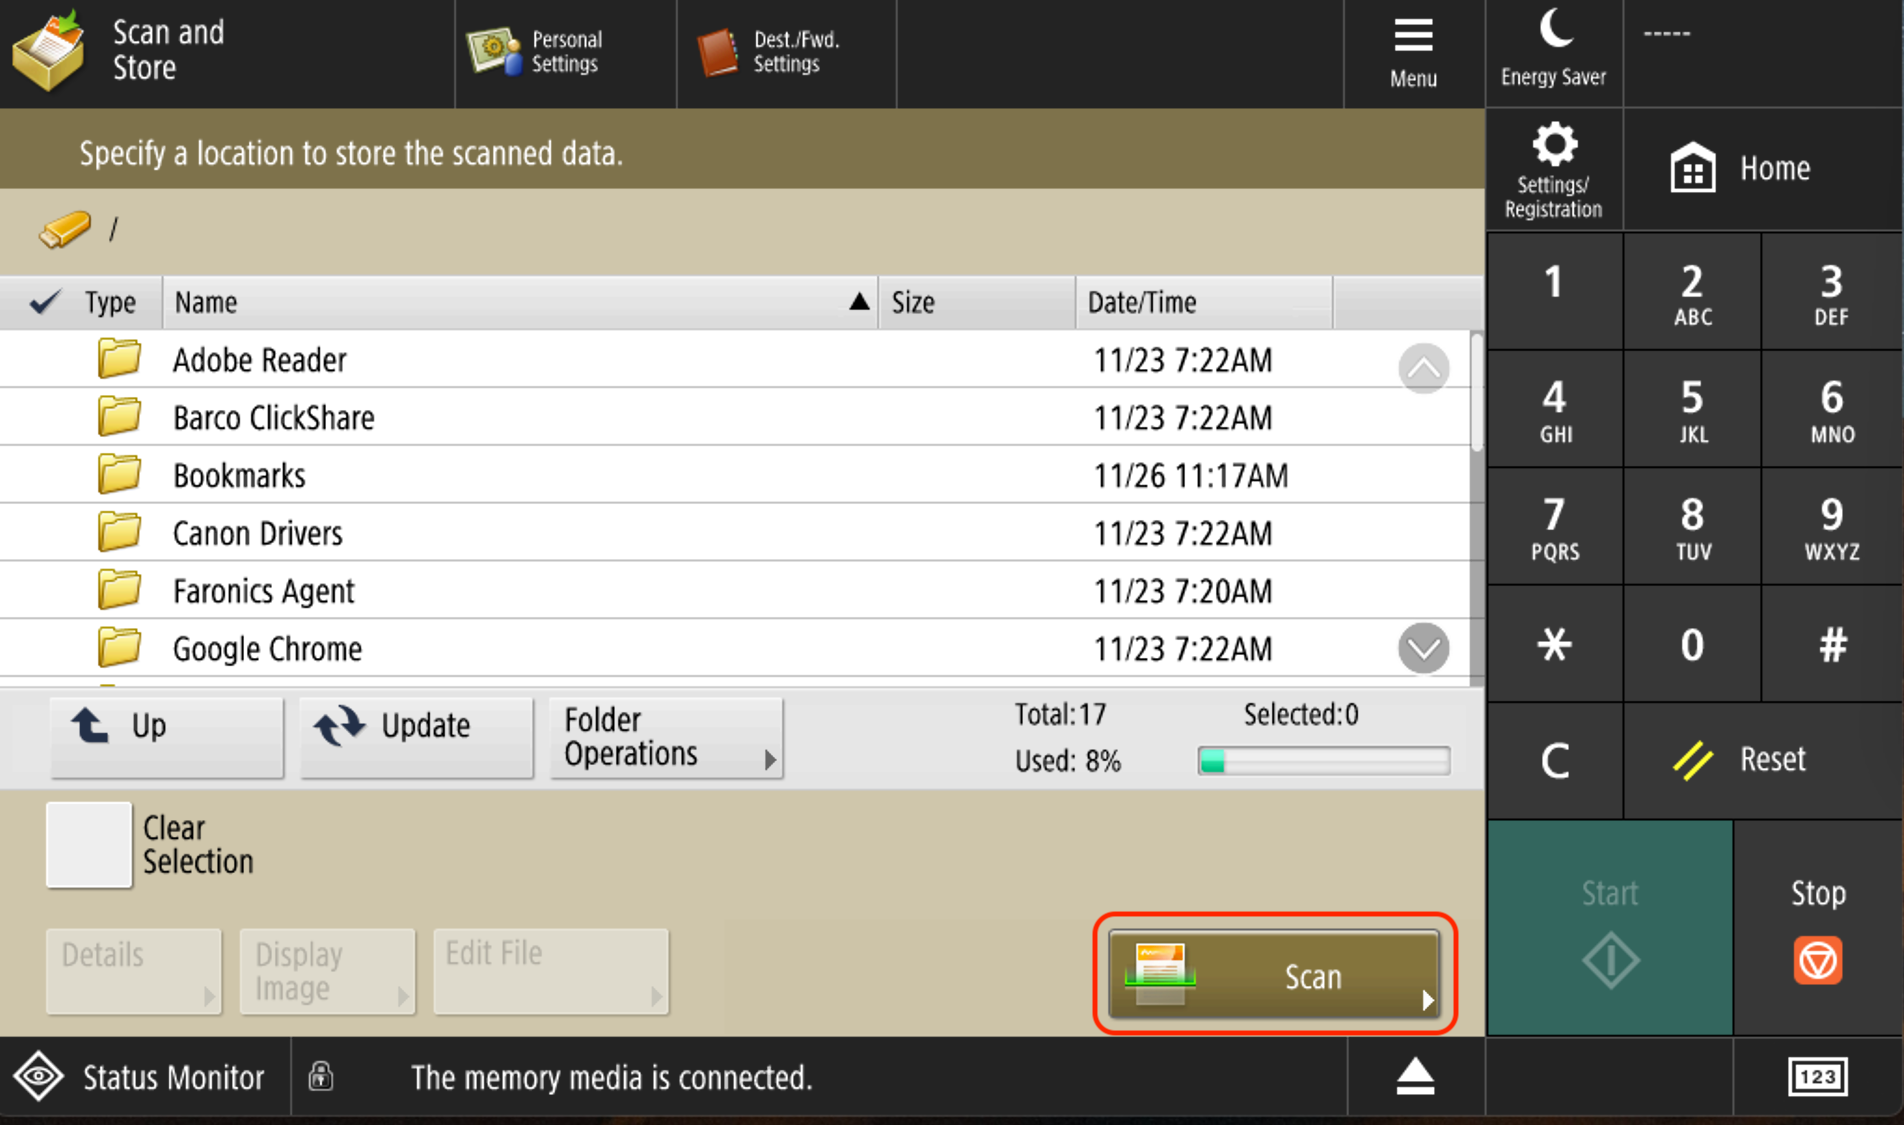
5) You will now be able to see any files stored on the USB-A drive. Press the Scan button on the display:
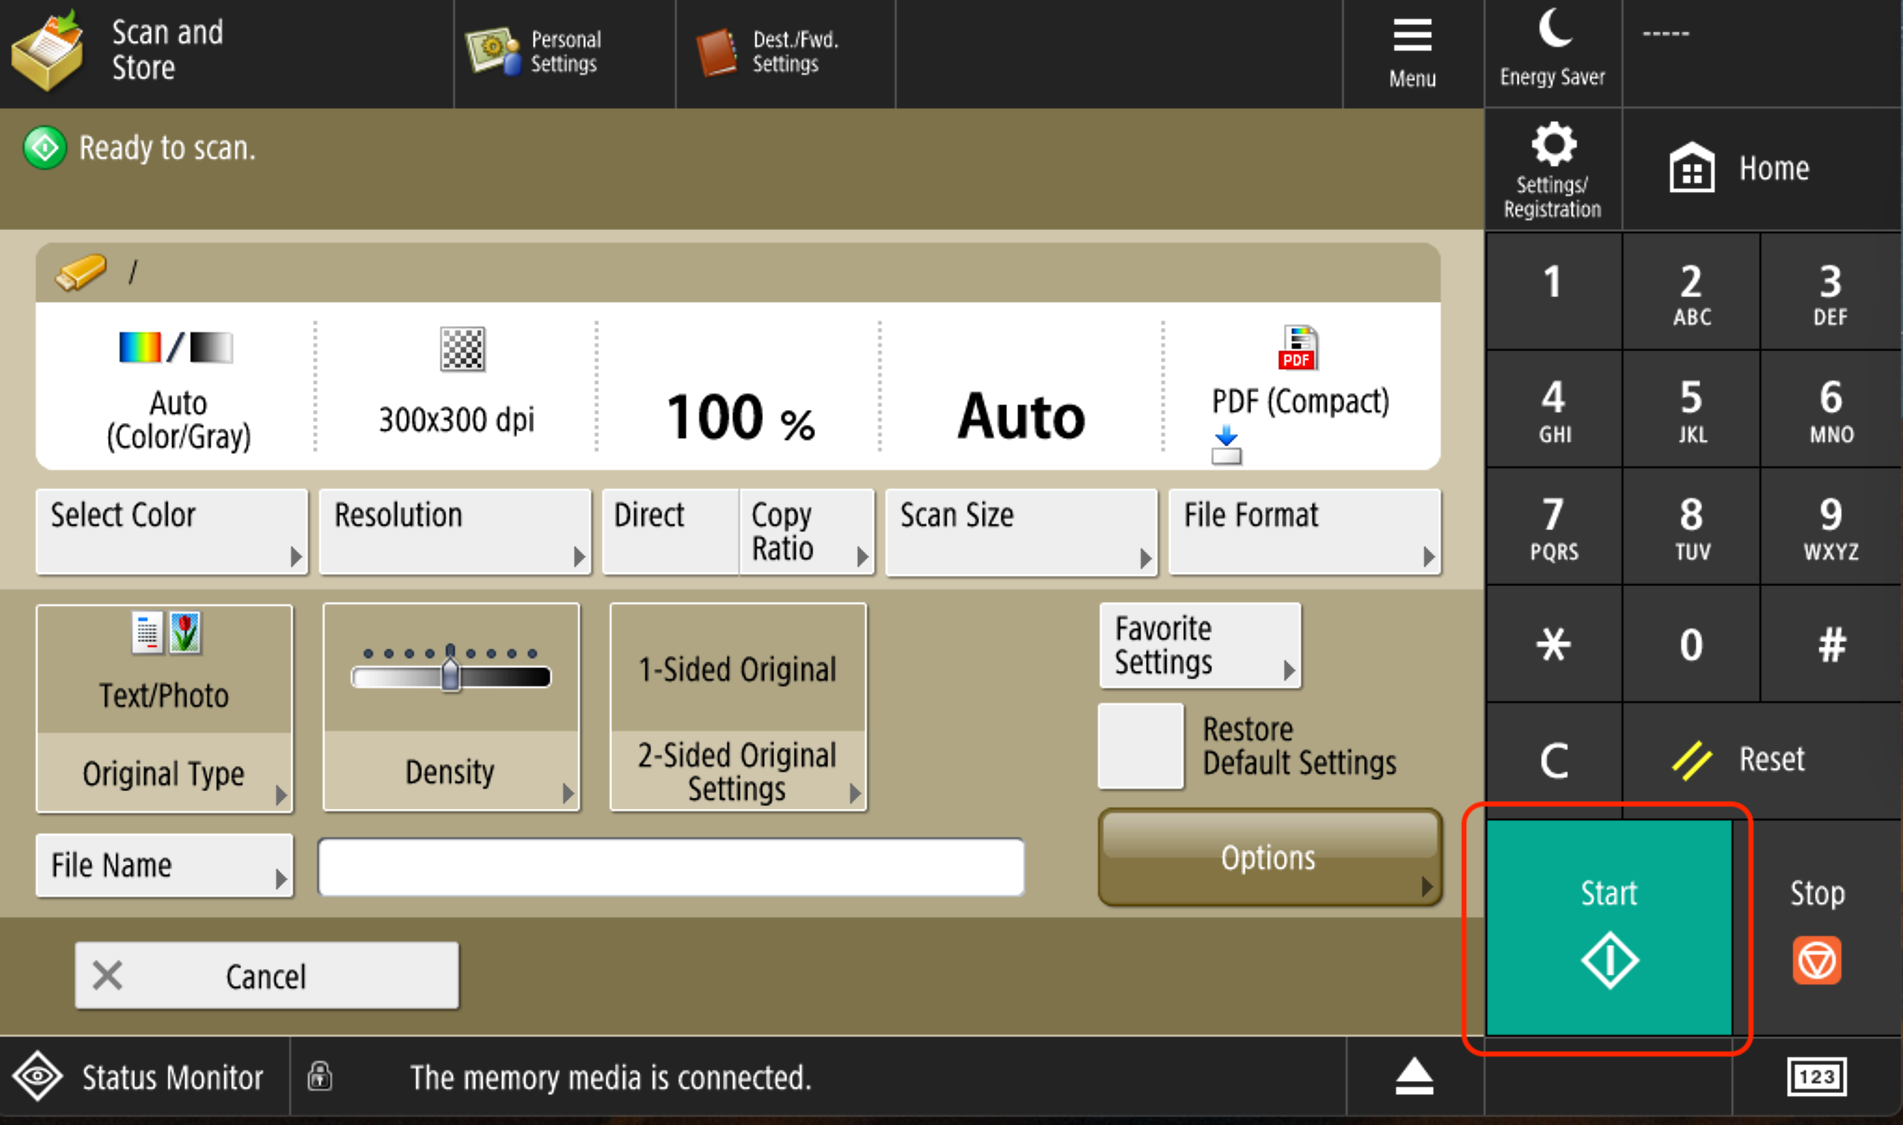
6) Here you can change your scan settings. Press the Start button on the display to scan your document:
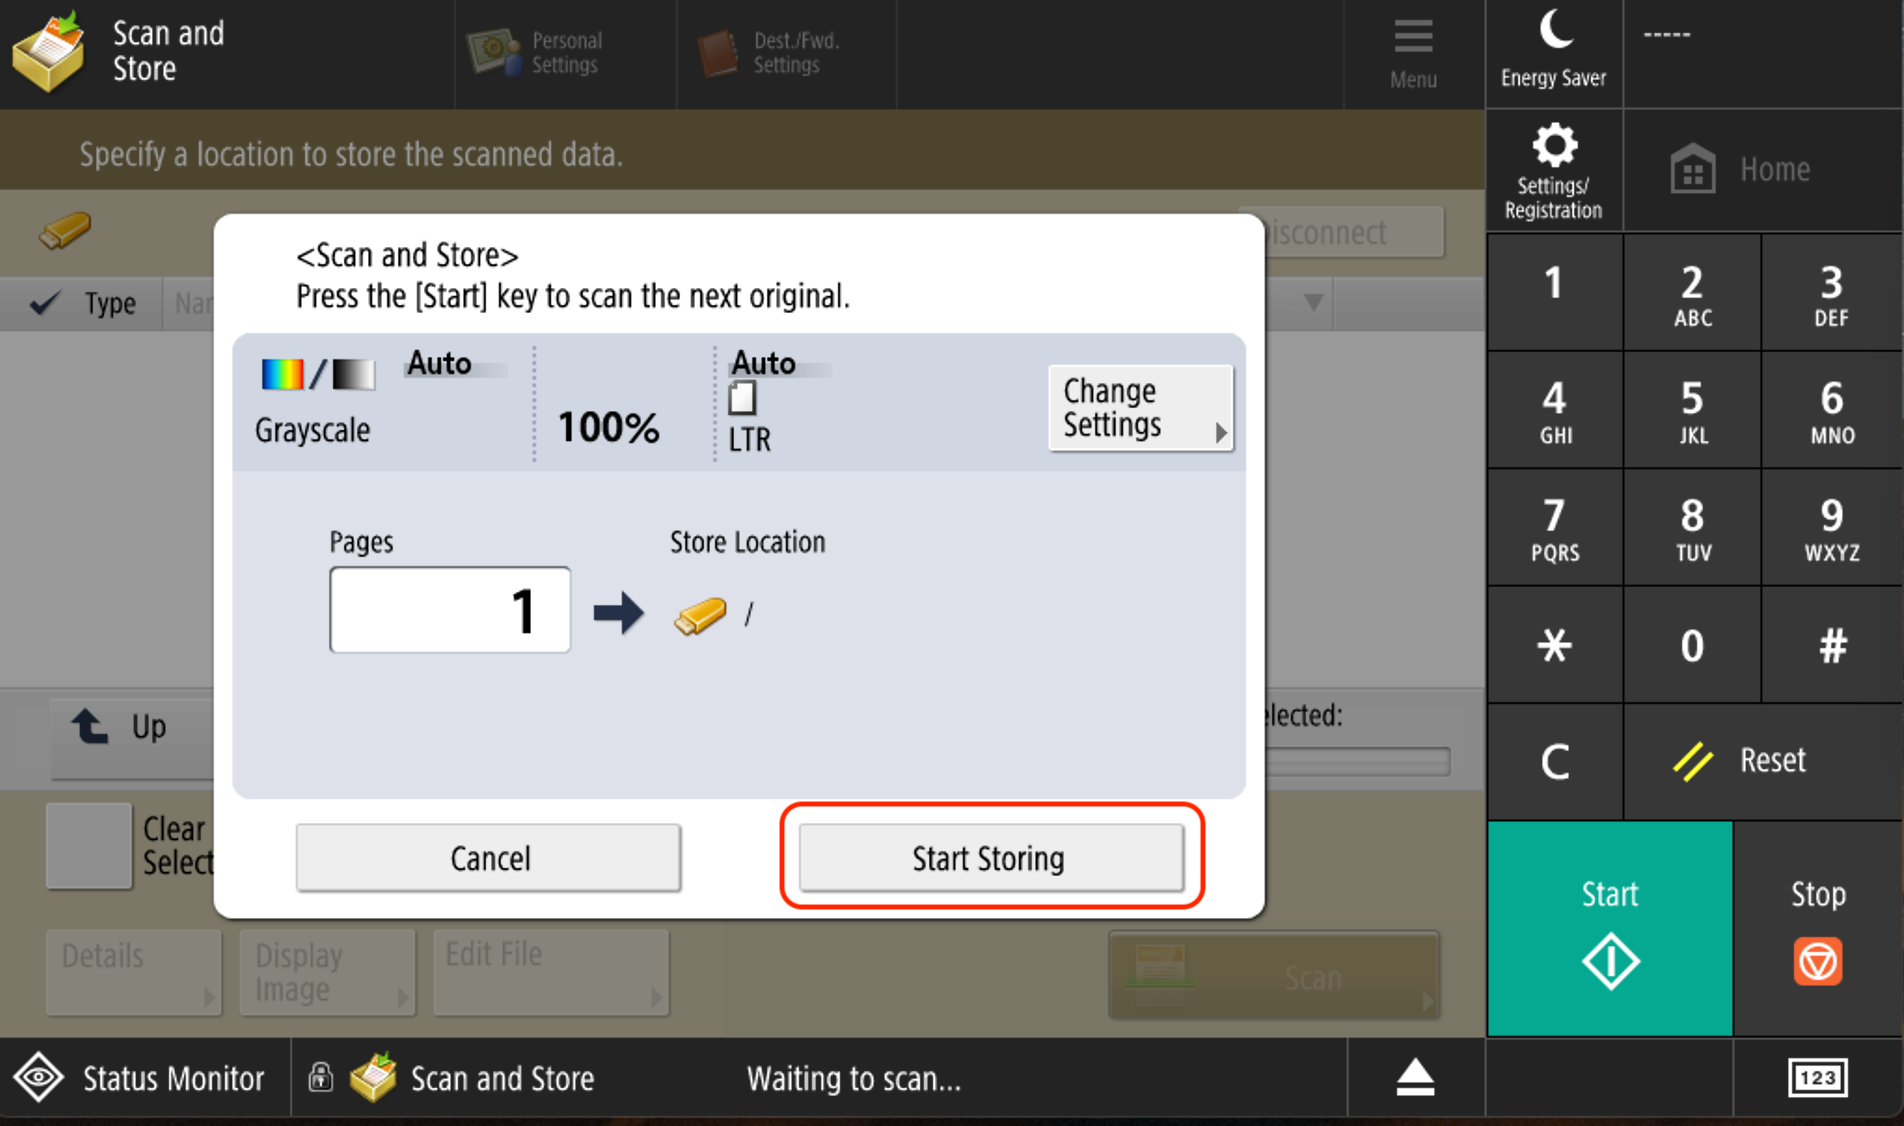
7) Press the Start Storing button on the display:
8) Your scanned document will now be available on the USB-A drive (Note: You may have to scroll down if you have existing folders & files on the USB-A drive.). Press the Eject button near the bottom-right of the display:

9) Press the Remove button on the display:

10) Press the OK button on the display:
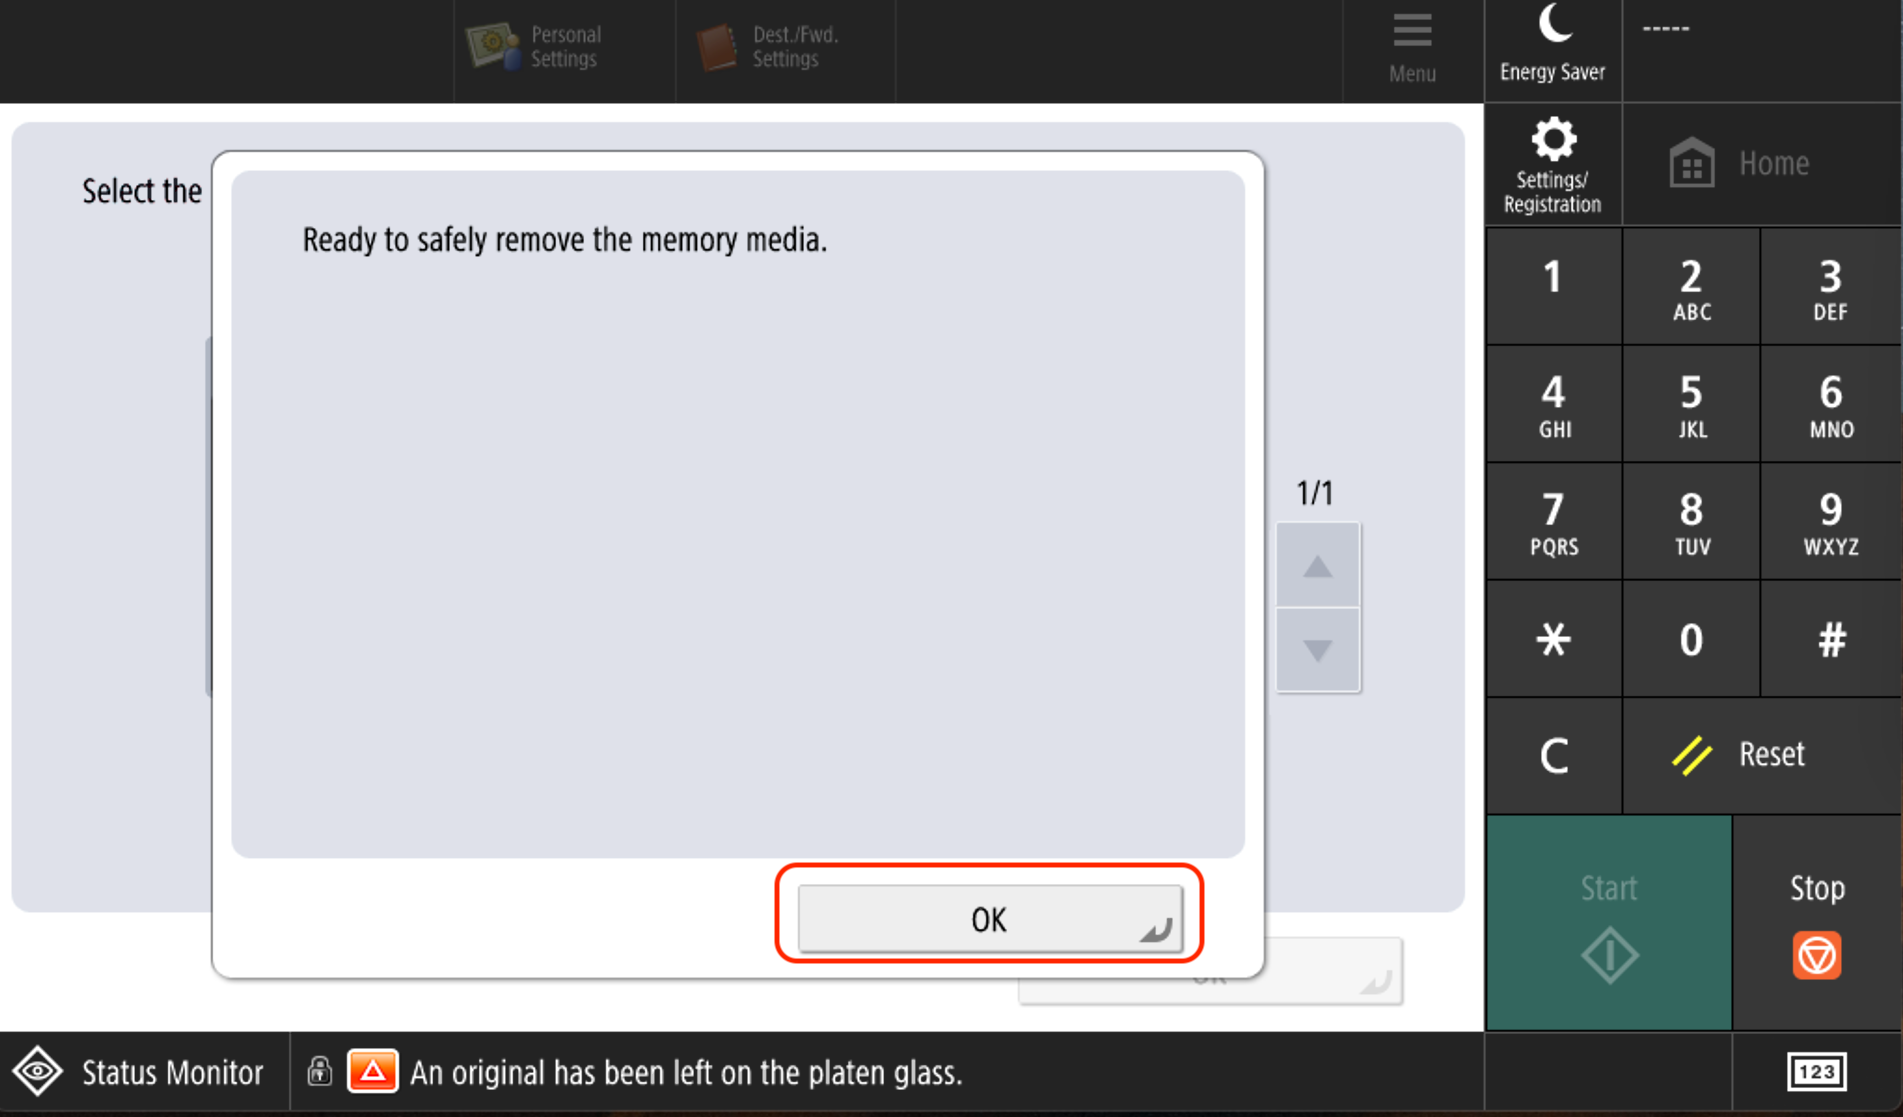
11) It is now safe to remove your USB-A drive from the Canon copier. Press the OK button on the display:

12) Press the Home button on the display to return to the main screen:

